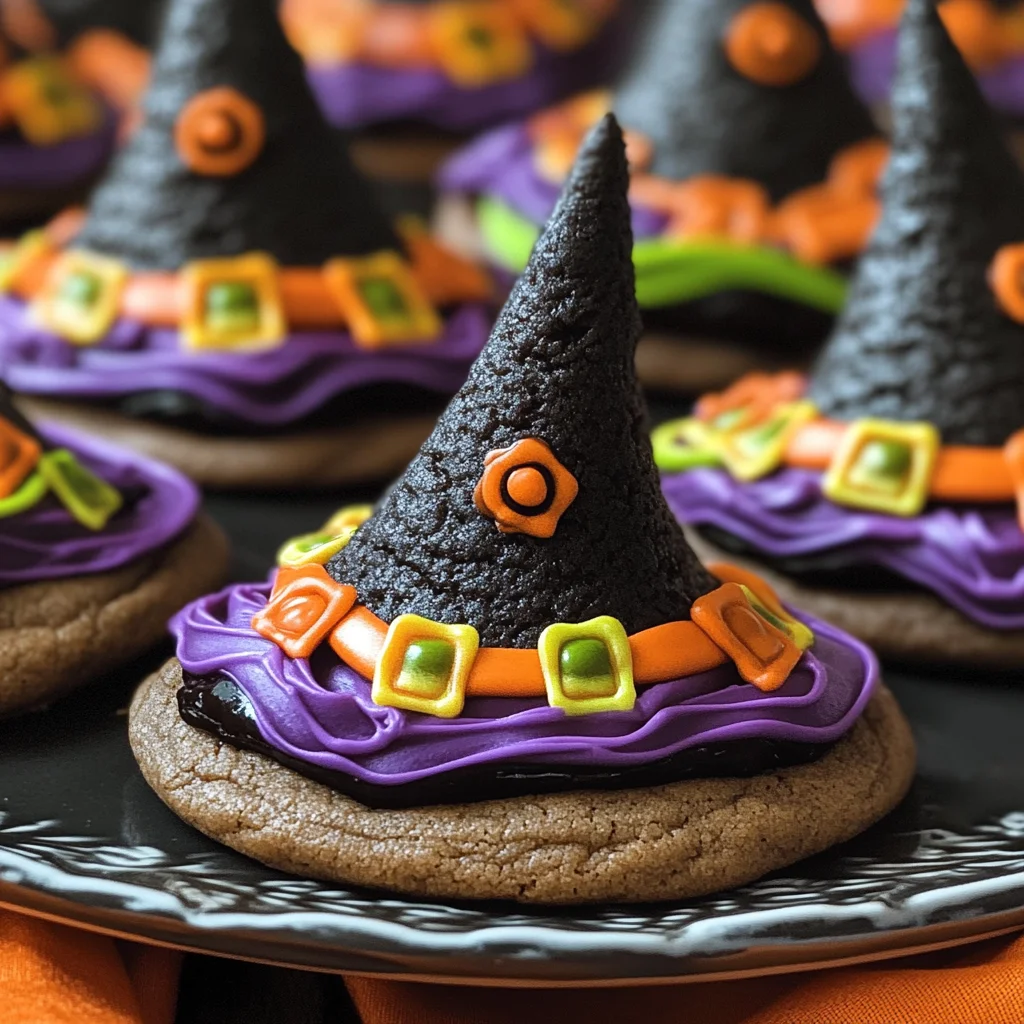
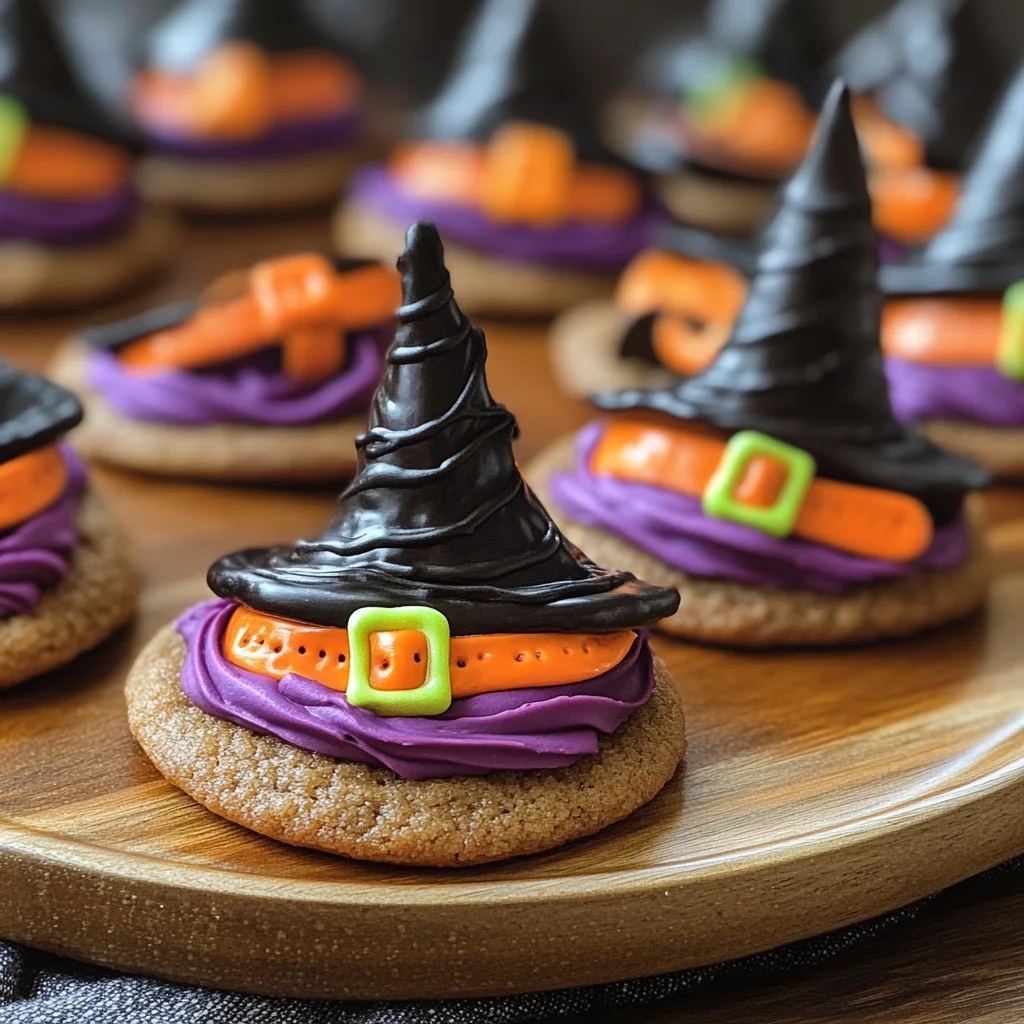
Halloween Witch Hat Cookies
If you’re looking for a delightful treat that captures the spirit of Halloween, you’ve come to the right place! These Halloween Witch Hat Cookies are not only adorable but also incredibly fun to make—especially with kids. Imagine a spooky cookie adorned with a chocolate cake cone hat, all decked out in colorful icing. It’s a recipe that brings smiles and giggles, making it perfect for family gatherings or Halloween parties.
What makes this recipe even more special is its versatility. You can customize the colors and designs to fit your theme or let your little ones unleash their creativity. Plus, they’ll be the star of any dessert table! So roll up those sleeves and get ready for some kitchen magic!
Why You’ll Love This Recipe
- Family-friendly fun: Making these cookies is a great way to bond with your kids. They’ll love helping out in the kitchen!
- Easy preparation: With simple steps and easy-to-find ingredients, you can whip these up without any stress.
- Customizable design: Let your imagination run wild! Change up colors and decorations to match your Halloween theme.
- Deliciously chocolaty: The combination of rich chocolate cookies and sweet icing makes each bite absolutely scrumptious.
Ingredients You’ll Need
Gathering ingredients for these enchanting Halloween Witch Hat Cookies is part of the fun! You’ll find everything you need right here, using simple and wholesome ingredients that will delight everyone at your gathering.
- Favorite Cake Mix or try Wilton’s Chocolate Cake Recipe
- Store Bought Chocolate Cookies or try this Recipe from Wilton
- Lemon Yellow Icing Color
- Black Color Mist Food Coloring Spray
- Rose Icing Colors Pink Food Coloring
- Violet Icing Color, Gel Food Coloring
- Golden Yellow Icing Color
- Orange Icing Color
- Sugar Cones
- Creamy White Decorator Icing, 4 lb. Tub
Variations
The beauty of these Halloween Witch Hat Cookies lies in their flexibility! You can easily switch things up based on what you have on hand or personal preferences. Here are some fun ideas to inspire you:
- Change the flavors: Use vanilla cake mix instead of chocolate for a different taste.
- Mix up the colors: Try using different gel food coloring shades to create unique hats!
- Add sprinkles: Top off your witch hats with festive sprinkles for an extra crunch and sparkle.
- Use different cookies: Swap out chocolate cookies for gingerbread or sugar cookies for a seasonal twist.
How to Make Halloween Witch Hat Cookies
Step 1: Prepare the Cake Cones
Start by preparing your cake mix according to the instructions provided in your chosen recipe. This step is crucial because it forms the base of our witch hats. Place your Cupcake Cones Baking Rack on a cookie sheet, insert sugar cones into the rack, and fill each cone with about 2 tablespoons of batter. Baking them until they rise beautifully ensures that you’ll have perfect witch hats once cooled!
Step 2: Spray the Cones
Once baked, it’s time to give those cones an enchanting makeover! If necessary, trim any excess cake from the top of each cone so they look nice and neat. Place them upside down on parchment paper, then carefully spray them with Black Color Mist. This gives them that classic witchy vibe while adding a touch of flair!
Step 3: Tint Your Icing & Prepare Decorating Bags
Now comes the fun part: tinting your icing! Start by tinting one cup of creamy white decorator icing orange. For purple icing, mix violet and rose colors together until you achieve a lovely shade. As you prepare two decorating bags fitted with tip 2B for orange and purple icings, don’t forget about yellow! Tint another ¼ cup of icing yellow using golden yellow and lemon yellow colors.
Step 4: Assemble Your Witch Hats
It’s time to put everything together! Using the orange icing, pipe a small dollop onto the center of each cookie before placing a cone on top. Then, use that same icing to pipe a band around half of the wide ends of the cones—smooth it out nicely with a spatula! Repeat this process using purple icing on the remaining cookies and cones. Finally, pipe a cute buckle around each band using yellow icing—what a charming touch! Let everything set for about 15-20 minutes before enjoying these spooky delights!
These Halloween Witch Hat Cookies are sure to be a hit at any gathering—happy baking!
Pro Tips for Making Halloween Witch Hat Cookies
Creating these whimsical cookies can be a delightful experience, especially with a few handy tips!
- Use Room Temperature Ingredients: Ensuring your ingredients are at room temperature can help achieve a smoother batter and better texture in your cookies, leading to delightful results.
- Customize the Colors: Feel free to mix and match icing colors! Personalizing your witch hats adds a fun twist and lets the kids get creative.
- Practice Piping Techniques: If you’re unsure about piping, practice on parchment paper first. This helps you get a feel for how much pressure to apply and improves the final look of your cookies!
- Let Icing Set Properly: Allowing the icing to set between steps is crucial for structure. Rushing this process might lead to smudgy or messy hats.
- Store Properly: Keep your finished cookies in an airtight container at room temperature. This keeps them fresh and ready to impress guests at your Halloween gatherings!
How to Serve Halloween Witch Hat Cookies
These Halloween Witch Hat Cookies are not only fun to make but also a joy to present! Here are some ideas on how to showcase them beautifully for your spooky celebrations.
Garnishes
- Edible Glitter: A sprinkle of edible glitter can add that extra magical touch, making your cookies shimmer under the Halloween lights.
- Candy Corn: Placing a few pieces of candy corn around your serving platter can enhance the festive vibe and provide a sweet treat for guests.
Side Dishes
- Pumpkin Spice Muffins: These moist muffins bring a warm fall flavor that complements the chocolatey richness of the witch hat cookies.
- Ghostly Fruit Skewers: Create spooky fruit skewers using bananas, grapes, and marshmallows. They add a refreshing contrast to the sweet cookies while remaining festive!
- Caramel Apple Slices: Crisp apple slices drizzled with caramel provide a crunchy, sweet side that pairs perfectly with the soft texture of the witch hats.
- Spooky Cheese Platter: Include an assortment of cheeses shaped like bats or pumpkins. This savory option balances out all the sweetness from the cookies while keeping things thematic!
With these tips and serving suggestions, you’re all set for an enchanting Halloween gathering filled with delicious treats!
Make Ahead and Storage
These Halloween Witch Hat Cookies are fantastic for meal prep, making them a great option for your spooky celebrations. You can prepare certain elements in advance to save time on the day of your Halloween festivities.
Storing Leftovers
- Keep leftover cookies in an airtight container at room temperature.
- Enjoy them within 3 to 5 days for the best taste and texture.
- If you live in a humid area, consider refrigerating them to maintain freshness.
Freezing
- Place cookies in a single layer on a baking sheet and freeze until solid.
- Transfer frozen cookies to a freezer-safe bag or container, separating layers with parchment paper.
- They can be frozen for up to 2 months. Just thaw at room temperature before serving.
Reheating
- For a soft, fresh-out-of-the-oven feel, preheat your oven to 350°F (175°C).
- Place cookies on a baking sheet and warm for about 5-7 minutes.
- Enjoy them warm for an extra special treat!
FAQs
Here are some common questions you might have about making these delightful Halloween Witch Hat Cookies.
Can I use different colors for decorating Halloween Witch Hat Cookies?
Absolutely! Feel free to get creative with your icing colors. Use any shades that match your Halloween theme or personal preference.
How do I make Halloween Witch Hat Cookies gluten-free?
To make these cookies gluten-free, substitute the cake mix with a gluten-free blend and ensure your chocolate cookies are also gluten-free. Check labels carefully!
What’s the best way to store Halloween Witch Hat Cookies?
Store them in an airtight container at room temperature. They’ll stay fresh for several days; just be sure they’re kept away from humidity.
Can I prepare the cookie components ahead of time?
Yes! You can bake the sugar cone hats and prepare the icing ahead of time. Just store everything separately until you’re ready to assemble.
Final Thoughts
I hope you enjoy creating these charming Halloween Witch Hat Cookies as much as I do! They’re not only fun to make but also bring a whimsical touch to any gathering. Your friends and family will surely be delighted by this spooky treat. So gather the kids, roll up your sleeves, and let your creativity shine this Halloween season. Happy baking!
Halloween Witch Hat Cookies

Get ready for a ghoulishly delightful experience with our Halloween Witch Hat Cookies! These charming treats feature chocolate cookies topped with cake cone hats, all dressed in vibrant icing that kids will love to decorate. Whether you’re hosting a Halloween party or just looking for a fun family activity, these cookies are perfect for bringing laughter and creativity into the kitchen. With easy-to-follow steps and customizable designs, these spooky desserts will be the highlight of your festive gatherings. So gather your ingredients, roll up your sleeves, and let the baking magic begin!
- Prep Time: 20 minutes
- Cook Time: 15 minutes
- Total Time: 35 minutes
- Yield: Approximately 12 cookie hats
- Category: Dessert
- Method: Baking
- Cuisine: American
Ingredients
- Cake mix (chocolate or vanilla)
- Chocolate cookies
- Sugar cones
- Creamy white decorator icing
- Gel food colorings (orange, purple, yellow, black)
- Optional: sprinkles for decoration
Instructions
- Prepare the cake mix as directed. Fill sugar cones with 2 tablespoons of batter and bake until risen.
- Once cooled, spray the cones with black color mist for a spooky look.
- Tint the white icing with orange, purple, and yellow colors as desired.
- Assemble by piping orange icing on each cookie before placing a cone on top. Decorate with additional icing and sprinkles.
- Allow to set for 15-20 minutes before serving.
Nutrition
- Serving Size: 1 cookie hat (50g)
- Calories: 180
- Sugar: 15g
- Sodium: 90mg
- Fat: 6g
- Saturated Fat: 3g
- Unsaturated Fat: 2g
- Trans Fat: 0g
- Carbohydrates: 30g
- Fiber: 1g
- Protein: 2g
- Cholesterol: 10mg